Create your meal plan grocery list in under an hour
Learn how to create a meal planning grocery list spreadsheet template that connects ingredients to meals, saving you time and money.
The most common mistake in building a meal planning grocery list spreadsheet template is failing to connect the actual ingredients to the meals they belong to. Without this link, your grocery list becomes a generic inventory of everything you might need, rather than a precise shopping guide for the week's planned dishes. This disconnect is why many people still end up staring at their pantry, wondering if they have that one specific spice for tonight's recipe. A well-structured template for meal planning and grocery lists should automate this connection, saving you time and preventing impulse buys.
You're looking for a practical meal planning grocery list spreadsheet template that actually works. This means it needs to handle recipes, ingredient quantities, and then translate that into a consolidated shopping list. It’s more than just two separate lists; it's a system where your meal choices directly inform your shopping needs. Get this right, and you can significantly cut down on food waste, save money, and reduce the daily stress of deciding "what's for dinner?"
The Core Components of an Effective Template
At its heart, a functional meal planning grocery list spreadsheet template needs three interconnected parts: a recipe manager, a weekly meal planner, and an automated grocery list generator. Each section needs to feed into the next.
The recipe manager is where you'll store your go-to meals. This isn't just the name of the dish, but a detailed breakdown of every ingredient required and the specific quantity. Think "2 cups all-purpose flour," "1 teaspoon salt," or "500g boneless, skinless chicken thighs." The key is to be granular enough that you can sum these up later.
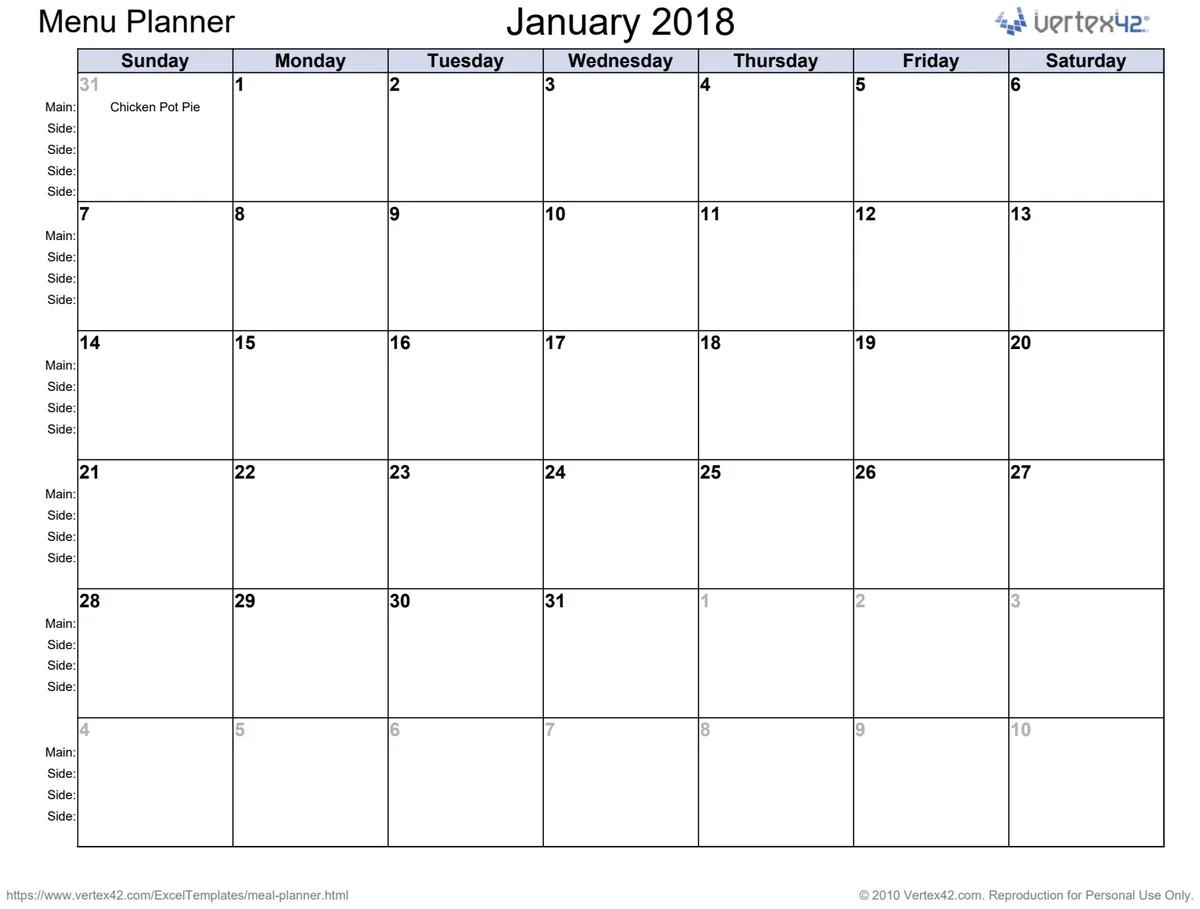
The weekly meal planner is your calendar. This is where you select recipes from your manager for each day of the week, assigning them to specific meals like breakfast, lunch, and dinner. Some people also include snacks or special occasions here. This is the interface where you make your choices, and it needs to be simple to use.
Finally, the grocery list generator pulls all the ingredients from the selected meals in your planner, consolidates them, and presents them in an organized format. This is the magic that saves you time and ensures you buy only what you need. This section should handle different units and potentially even combine similar items.
Structuring Your Recipe Manager
When setting up your recipe manager, aim for clarity and detail. Create columns for:
- Recipe Name: A unique identifier for each dish. This is crucial for linking.
- Ingredient: The name of the food item (e.g., "Onion," "Garlic Clove," "Olive Oil"). Consistency here is vital. "Tomatoes" and "Tomato" will be treated as different items if not standardized.
- Quantity: The numerical amount needed (e.g., "1," "2," "0.5").
- Unit: The measurement for the quantity (e.g., "cup," "tsp," "tbsp," "g," "oz," "cloves," "each").
- Notes: Any specific preparation needed for the ingredient (e.g., "diced," "minced," "melted") or brand preferences. This column is optional but can be useful for clarity.
For example, a row might look like: | Recipe Name | Ingredient | Quantity | Unit | Notes | | :------------------- | :----------------- | :------- | :----- | :--------- | | Chicken Stir-fry | Chicken Breast | 500 | g | thinly sliced | | Chicken Stir-fry | Soy Sauce | 0.25 | cup | low sodium | | Chicken Stir-fry | Broccoli Florets | 2 | cups | fresh | | Tomato Soup | Canned Diced Tomatoes | 1 | can | 14.5 oz | | Tomato Soup | Vegetable Broth | 4 | cups | |
This detailed approach ensures that when you select "Chicken Stir-fry" for Tuesday's dinner, the spreadsheet knows precisely what ingredients and amounts are required.
Handling Ingredient Variations
A common challenge is that the same ingredient might be listed with slightly different names or units across recipes. For instance, one recipe might call for "1 onion, chopped," while another uses "1/2 yellow onion." To make your automated grocery list effective, you need a way to standardize these.
One approach is to create a separate "Ingredient Master List" with a "Standard Name" column. You can then use a formula like VLOOKUP or XLOOKUP in your recipe manager to pull a standardized ingredient name based on what you type. For example, if you type "yellow onion" in the recipe manager, an XLOOKUP could return "Onion" to ensure consistency.
Another, simpler method is to enforce strict naming conventions in your "Ingredient" column. Decide that all onions, regardless of type or preparation, will just be called "Onion." If a recipe requires a specific type, add that to the "Notes" column. This relies on user discipline but is easier to set up initially.
The Importance of Units
The "Unit" column is critical for accurate aggregation. If one recipe calls for "2 cups flour" and another for "500g flour," you can't simply sum these numbers. Your grocery list generator will need to handle unit conversions or present them separately. For simplicity, many templates either require all quantities of a specific ingredient to use the same unit (e.g., always use grams for flour) or require manual consolidation for items with different units. For a truly automated system, you'd need a more complex lookup table for unit conversions, but for most home use, standardizing units within your recipes is sufficient.
Designing Your Weekly Meal Planner
The meal planner acts as the central hub for your week. It should be intuitive and visually clear.
- Days of the Week: Columns for each day (e.g., Monday, Tuesday, Wednesday, etc.).
- Meals: Rows for Breakfast, Lunch, and Dinner. You can add more rows for snacks or specific meal types.
- Recipe Selection: A dropdown menu or a data validation list in each day/meal cell that pulls from your "Recipe Name" column in the Recipe Manager. This is usually achieved using "Data Validation" in Excel or Google Sheets, set to "List from a range."
When you select a recipe, like "Spaghetti Bolognese" for Monday Dinner, the planner records this choice. The real power comes when this selection triggers the ingredient aggregation for your grocery list.
Linking Recipes to Planner Entries
The connection between your Recipe Manager and your Meal Planner is usually made using a formula in a hidden or separate sheet that prepares data for the grocery list. For example, if your Meal Planner has recipes listed in cells B2 (Monday Dinner) through H4 (Sunday Dinner), you'll need a way to extract these recipe names.
A simple approach is to create a list of all selected recipes for the week. If your planner is laid out from B2 to H4, you could have a helper range (say, J2:J20) that lists all the recipes selected. You can populate this by simply referencing the cells: =B2, =C2, ..., =H4. Then, filter out any blank cells.
Handling Multiple Servings and Recipe Scaling
A common pitfall is that recipes are written for a specific number of servings (e.g., 4 people), but your household size varies, or you want leftovers. Your template should ideally account for this.
Option 1: Manual Adjustment in Planner: Add a column next to the recipe selection in your planner for "Servings Needed." If a recipe is for 4 and you need 6 servings, you'd note "6" there. Then, in your Recipe Manager, you'd need to store ingredients per serving or per standard recipe quantity. The formula that pulls ingredients would then multiply the ingredient quantity by (Servings Needed / Original Servings).
Option 2: Duplicate Recipes: For simplicity, you can duplicate recipes in your Recipe Manager if you often make them in larger batches. For example, have "Spaghetti Bolognese (x2 Batch)" if you always double it. This is less flexible but easier to manage.
Option 3: Store Ingredients per Serving: In your Recipe Manager, list quantities per serving. So, for "Spaghetti Bolognese," you might have "Ground Beef" listed as "0.125 kg" and "Unit" as "kg" (assuming a standard recipe is for 8 servings). If you plan for 4 servings, the system multiplies 0.125 by 4 to get 0.5 kg. If you plan for 8, it multiplies by 8 to get 1 kg. This requires consistent data entry in your Recipe Manager.
For most users, a combination of Option 1 (manual adjustment in the planner) and Option 3 (storing ingredients per serving in the Recipe Manager) offers a good balance of flexibility and manageability.
Building the Automated Grocery List Generator
This is where the magic happens. This section pulls data from your Meal Planner and Recipe Manager to create a consolidated shopping list.
The core logic involves:
- 01Identifying all the recipes selected in your Meal Planner for the week.
- 02For each selected recipe, looking up all its ingredients and quantities in the Recipe Manager.
- 03Aggregating these ingredients, summing up quantities for identical items.
- 04Presenting the final list.
Let's imagine your Meal Planner is on a sheet called "Planner" with recipes in cells B2:H4. Your Recipe Manager is on a sheet called "Recipes" with columns A (Recipe Name), B (Ingredient), C (Quantity), D (Unit).
First, you need a consolidated list of all ingredients for all planned meals. You can create a temporary list of all recipe names from your planner, filtering out blanks. Let's say this list is in column J of your "Planner" sheet.
Then, in a new sheet called "Grocery List," you can use formulas to pull the data. A common and powerful method is to use FILTER and SUMIFS.
Step-by-step walkthrough:
- 01Consolidate Recipe Names: On your "Planner" sheet, in cell
J2, enter:
``Excel =UNIQUE(FILTER(B2:H4, B2:H4<>"")) `` This spills a unique list of all recipes you've planned.
- 02List All Ingredients: In your "Grocery List" sheet, starting in cell
A2, you can use a formula to list all ingredients associated with the recipes inJ2from the "Planner" sheet. If your "Recipes" sheet has columnsA(Recipe Name),B(Ingredient),C(Quantity),D(Unit), you can do this:
In cell A2 of "Grocery List": ``Excel =SORT(UNIQUE(FILTER('Recipes'!B:B, ISNUMBER(MATCH('Recipes'!A:A, Planner!$J$2#, 0))))) `` This formula does a few things:
MATCH('Recipes'!A:A, Planner!$J$2#, 0): Checks if the recipe name in the "Recipes" sheet exists in your consolidated list of planned recipes (Planner!$J$2#).ISNUMBER(...): Returns TRUE for matches.FILTER('Recipes'!B:B, ...): Filters the Ingredient column (B:B) from the "Recipes" sheet, showing only ingredients for your planned meals.UNIQUE(...): Ensures each ingredient appears only once in this initial list.SORT(...): Sorts the ingredients alphabetically for easier reading.
- 03Sum Quantities: Now, for each ingredient in your "Grocery List" sheet (let's say it's in column
A), you need to sum the quantities. In cellB2of "Grocery List":
``Excel =SUMIFS('Recipes'!C:C, 'Recipes'!B:B, A2, 'Recipes'!A:A, "<>"&"") ` This formula sums quantities ('Recipes'!C:C) where the ingredient ('Recipes'!B:B) matches the ingredient in cell A2 of the "Grocery List" sheet, and the recipe name ('Recipes'!A:A`) is not blank.
- 04Add Units: In cell
C2of "Grocery List":
``Excel =IF(A2<>"", INDEX('Recipes'!D:D, MATCH(A2&"*", 'Recipes'!B:B&"*", 0)), "") `` This is a simplified way to fetch the unit. It finds the first occurrence of the ingredient in the "Recipes" sheet and returns its unit. A more robust solution would handle cases where the same ingredient might have different units, but this works for many basic setups. For true aggregation of different units, you'd need a more complex system.
- 05Combine and Finalize: You can then drag these formulas down. To make it look cleaner, you might want to combine the quantity and unit. In cell
D2of "Grocery List":
``Excel =IF(A2="", "", A2 & ": " & B2 & " " & C2) ` This combines the ingredient name, quantity, and unit. You can then hide columns A, B, and C and only display column D`.
Example Data Flow:
- Planner Sheet:
- Monday Dinner: "Chicken Stir-fry"
- Tuesday Dinner: "Tomato Soup"
- Recipes Sheet:
| Recipe Name | Ingredient | Quantity | Unit | | :-------------- | :--------------- | :------- | :--- | | Chicken Stir-fry| Chicken Breast | 500 | g | | Chicken Stir-fry| Soy Sauce | 0.25 | cup | | Chicken Stir-fry| Broccoli Florets | 2 | cups | | Tomato Soup | Canned Tomatoes | 1 | can | | Tomato Soup | Vegetable Broth | 4 | cups |
- Grocery List Sheet (after formulas):
| Combined List | | :-------------------- | | Broccoli Florets: 2 cups | | Canned Tomatoes: 1 can | | Chicken Breast: 500 g | | Soy Sauce: 0.25 cup | | Vegetable Broth: 4 cups |
This example assumes each ingredient appears only once per recipe. If "Chicken Stir-fry" also used "1 Onion," that would be added to the "Grocery List" sheet as "Onion: 1 each" (or whatever unit you defined). If you planned "Chicken Stir-fry" twice, the quantities for its ingredients would be doubled.
Handling Pantry Staples and Exclusions
Not everything you need is a new purchase. Common items like salt, pepper, cooking oil, flour, and sugar are often pantry staples. You don't want these cluttering your grocery list every week.
Method 1: Separate "Pantry" List: Create a separate list of items you always have on hand. When your automated grocery list generates, you can manually cross-reference and remove these items.
Method 2: "Pantry" Tagging: Add a column in your Recipe Manager called "Pantry Item" (Yes/No). In your grocery list generator formulas, add a condition to exclude items where this column is "Yes." For example, modify the FILTER formula on the "Grocery List" sheet: ``Excel =SORT(UNIQUE(FILTER('Recipes'!B:B, ISNUMBER(MATCH('Recipes'!A:A, Planner!$J$2#, 0)) * ('Recipes'!E:E <> "Yes")))) ` (Assuming your "Pantry Item" column is E:E` on the "Recipes" sheet and "Yes" means it's a pantry item.)
Sorting and Categorizing Your List
A grocery list is most useful when it's organized. Most supermarkets group items by category (produce, dairy, meat, canned goods, etc.). You can replicate this in your spreadsheet.
Option 1: Manual Categorization: Add a "Category" column to your Recipe Manager for each ingredient (e.g., "Produce," "Meat," "Pantry," "Spices"). Then, in your Grocery List sheet, fetch this category and sort your final list by category. In the "Grocery List" sheet, add a "Category" column (say, E2): ``Excel =IF(A2<>"", INDEX('Recipes'!E:E, MATCH(A2, 'Recipes'!B:B, 0)), "") ` (Assuming Category is column E` on the "Recipes" sheet). Then, sort your entire "Grocery List" sheet by the Category column.
Option 2: Auto-Categorization with Lookup: For a more automated approach, create a separate lookup table mapping ingredients to categories. Use VLOOKUP or XLOOKUP to pull the category for each ingredient. This requires maintaining the lookup table but offers consistency.
Common Pitfalls and How to Avoid Them
- Inconsistent Ingredient Naming: As mentioned, "Tomato" vs. "Tomatoes" or "Chicken Breast" vs. "Chicken Breasts" will break aggregation. Standardize your naming in the Recipe Manager.
- Unit Mismatches: Trying to add "2 cups flour" and "500g flour" directly will lead to errors. Decide on a standard unit for common ingredients or accept that these will need manual checking.
- Overlooking Staples: Forgetting to account for pantry items that run out, or conversely, listing items you always have. Use the "Pantry Item" tagging or a separate staple list.
- Recipe Scaling Issues: Not adjusting ingredient quantities when planning for more or fewer servings than the recipe's default. Implement a system for scaling, whether manual or formula-driven.
- Ignoring Prep Time/Steps: While not directly for the grocery list, a recipe manager should also include prep and cooking instructions. If these are missing, the grocery list is only half the solution.
- Too Much Detail in Recipes: Listing "1/4 cup chopped onion" in the Recipe Manager is less flexible than "1/2 cup onion" and then a note "chopped." Store base quantities and let the "Notes" column handle preparation.
Advanced Features and Customization
Once you have the core system working, you can enhance it.
Tracking Inventory and Expiry Dates
If you want to be truly efficient, you can extend the Recipe Manager to include current inventory levels and expiry dates.
- Inventory Column: Add a column like "In Stock (Quantity)" and "In Stock (Unit)" to your Recipe Manager or a separate inventory sheet.
- Expiry Date Column: Add an "Expiry Date" column.
- Conditional Formatting: Use conditional formatting on the "Expiry Date" column to highlight items nearing expiry (e.g., yellow if expiring within 7 days, red if expired).
- Smart Grocery List: Modify your grocery list formulas to check your inventory. If you have "300g" of chicken breast in stock, and a recipe calls for "500g," the grocery list should only add the remaining "200g." This requires more complex formulas, often involving
SUMIFSto calculate total needed and then subtracting the stock.
Budgeting Integration
Tie your meal planning to your budget.
- Cost per Ingredient: Add a "Cost per Unit" column to your Recipe Manager.
- Cost per Recipe: Use a formula to calculate the total cost of each recipe (
SUMIFSon quantity * cost per unit). - Weekly Budget Tracking: Sum the costs of all recipes planned for the week. Compare this to your allocated food budget. You can create a dashboard on a separate sheet to visualize weekly spending against budget.
Recipe Rating and Filtering
As you build your recipe collection, you'll want to know which ones are hits.
- Rating Column: Add a "Rating" column (e.g., 1-5 stars) to your Recipe Manager.
- Filtering: Use Excel's/Google Sheets' filter function on your Recipe Manager to quickly find your favorite recipes.
- Planner Suggestions: For advanced users, you could even create a formula in the Planner that suggests recipes based on your rating or how long it's been since you last made a dish.
Frequently Asked Questions
How do I handle recipes that use volume and weight for the same ingredient?
This is a common challenge. The most practical solution for a home user is to standardize the units within your Recipe Manager for each ingredient. For example, decide that all flour quantities will be in grams, and all liquids like milk or broth will be in milliliters or cups. If a recipe originally specifies weight for a liquid or volume for a dry good, you'll need to convert it once when you enter it into your template. Tools like Google's unit converter can help.
Can I use this template for both physical and digital grocery lists?
Absolutely. The generated list can serve as a basis for both. You can print it out, or if you use a grocery store's app that allows custom lists, you can manually input the items from your spreadsheet into their app. Some advanced users even explore custom scripts or integrations to push data to shopping apps, but this is beyond the scope of a basic template.
What if a recipe calls for a specific brand of an ingredient?
You can use the "Notes" column in your Recipe Manager for this. For instance, if a recipe requires "1 can (14.5 oz) Muir Glen Organic Diced Tomatoes," you'd enter "Muir Glen Organic Diced Tomatoes" in the Ingredient column and "1 can (14.5 oz)" in the Quantity and Unit columns, with "Muir Glen Organic" in the Notes. Your grocery list generator will simply list "Muir Glen Organic Diced Tomatoes" and the quantity, ensuring you buy the correct item.