Google Sheets content calendar template to organize your posts
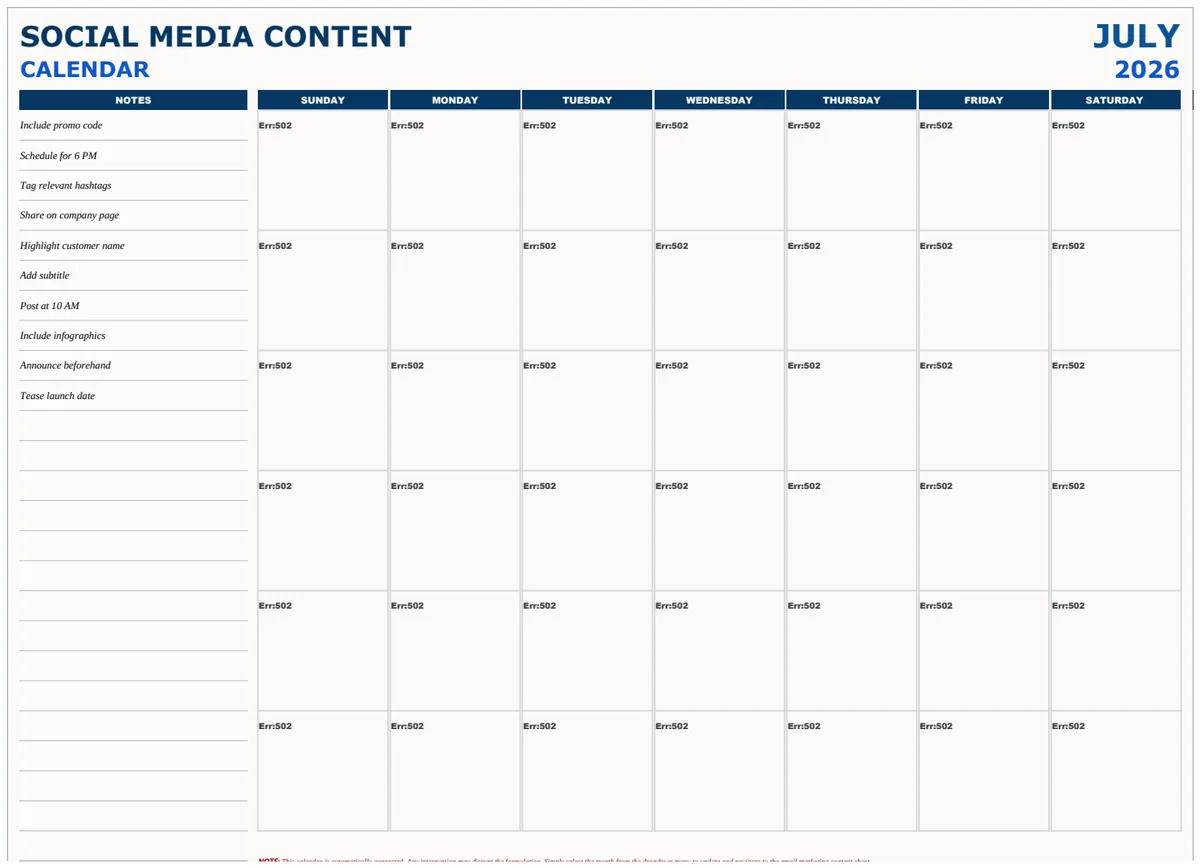
A content calendar template in Google Sheets is a strategic tool to organize posts and align content with marketing goals.
A content calendar isn't just a list of posts; it's a strategic tool that aligns your content creation with your broader marketing goals. When you're planning for multiple platforms, each with its own cadence and audience, a well-structured Google Sheet can be your most valuable asset. It prevents last-minute scrambling and ensures your message is consistent, timely, and impactful across all channels.
This approach moves beyond a simple spreadsheet. It builds a dynamic system where you can track progress, assign responsibilities, and visualize your entire content pipeline. You'll be able to identify opportunities for repurposing content, spot periods of low activity, and ensure that your publication schedule remains balanced and effective, all without needing advanced technical skills.
Setting Up Your Core Calendar Sheet
The foundation of any effective content calendar is a clear, organized list of all your planned content. This main sheet acts as your central hub, where every idea, draft, and published piece is logged. It's where you'll spend most of your time planning and tracking.
Here are the essential columns that provide the structure for a comprehensive calendar:
- Publish Date: The exact date the content is scheduled to go live. This is critical for timing.
- Content Title/Topic: A descriptive name for the piece. This should be specific enough to understand the subject matter at a glance.
- Content Type: Categorize the format of your content. Examples include: Blog Post, Social Media (and specify platform if needed), Email Newsletter, Video, Podcast Episode, Infographic, Webinar, Case Study, Ebook.
- Primary Platform(s): List the main channels where this content will be distributed. For social media, you might list Instagram, LinkedIn, Twitter, Facebook, TikTok, etc. For other content, it could be your Website, YouTube, Spotify, etc.
- Status: This tracks the current stage of the content production. Essential statuses might be: Idea, Briefed, Researching, Drafting, Editing, Design, Legal Review, Final Approval, Scheduled, Published, Needs Update, Archived.
- Owner/Assignee: The name or initials of the team member responsible for creating or managing this specific piece of content.
- Key Message/Objective: What is the core takeaway you want your audience to get from this content? What business goal does it serve (e.g., drive traffic, generate leads, build brand awareness, educate users)?
- Call to Action (CTA): What specific action do you want the reader or viewer to take after engaging with the content (e.g., "Sign up for our webinar," "Download the ebook," "Visit our pricing page," "Leave a comment")?
- Supporting Assets/Links: Include links to draft documents, design files, relevant research, or any other resources needed for content creation.
- Performance Metrics (Optional): For published content, you might add columns to track key metrics like views, clicks, engagement rate, conversions, or ROI. This helps in analyzing content effectiveness later.
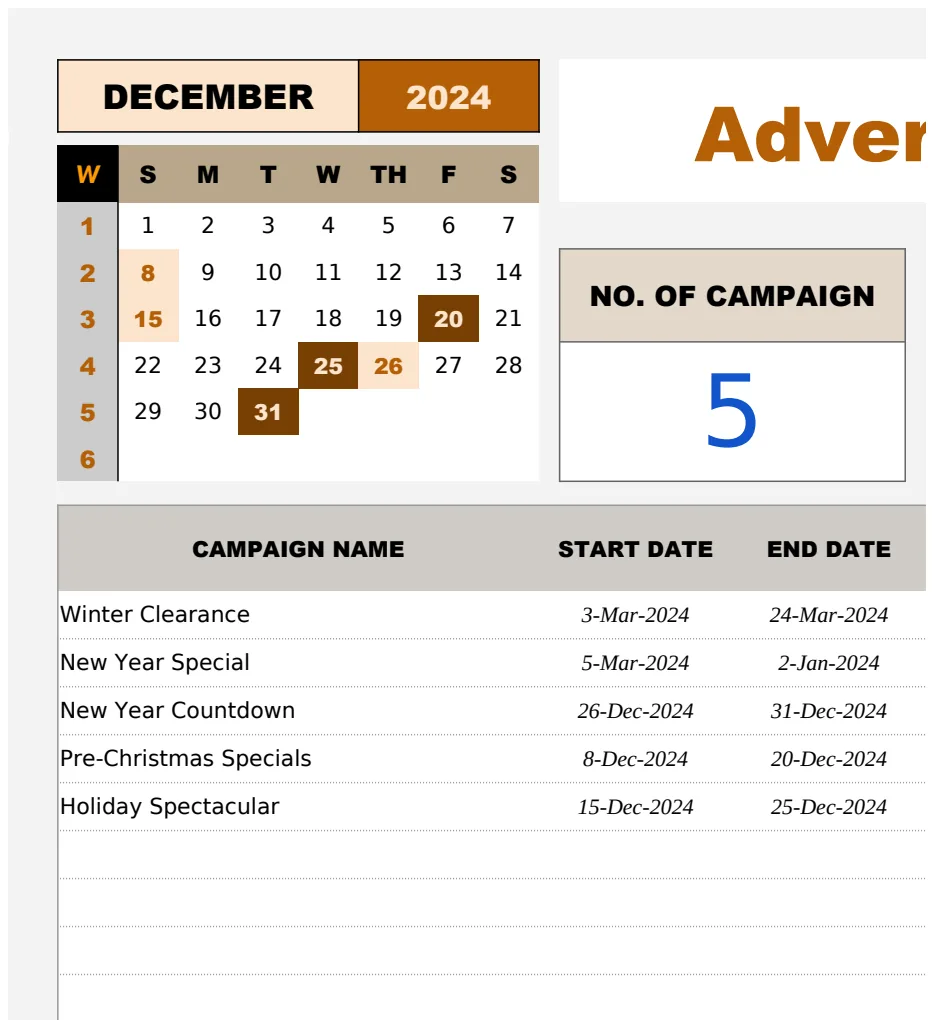
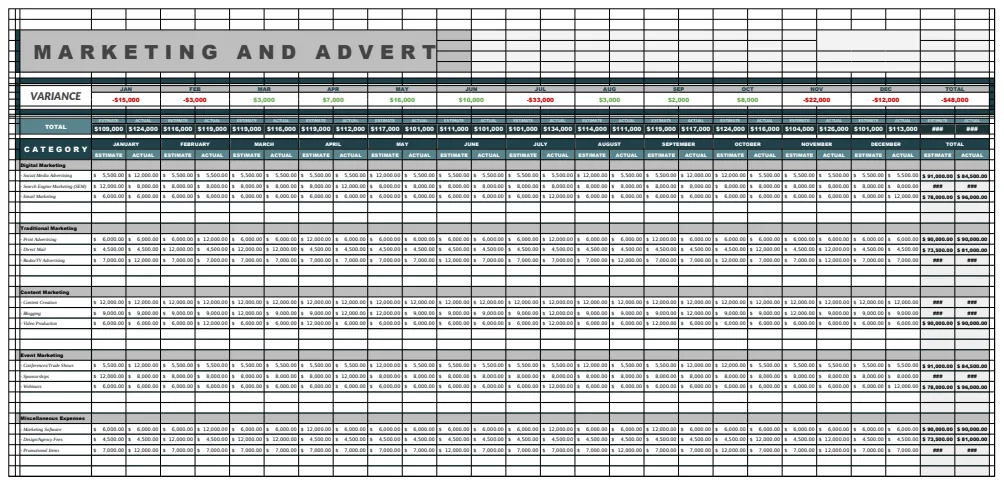
For a more specialized approach, especially for paid campaigns, consider a template like the Advertising Social Media Content Calendar Template. Such templates often include fields for ad creative versions, budget allocation, target audience segments, and ad performance metrics, providing a deeper layer of detail for marketing campaigns.
Implementing Status Tracking with Data Validation
Accurate status tracking is crucial for managing workflow and ensuring deadlines are met. Data validation in Google Sheets allows you to create dropdown menus for your status column, standardizing entries and reducing errors.
- 01Create a Dedicated "Lists" Sheet: In your Google Sheet, add a new tab and name it "Lists" or "Dropdown Data." This sheet will hold all the options for your dropdown menus.
- 02Define Your Statuses: In column A of your "Lists" sheet, enter each possible status as a separate item. For example:
IdeaBriefingResearchingDraftingEditingDesignReview (Internal)Review (Client)Final ApprovalScheduledPublishedNeeds UpdateArchived
- 03Return to Your Main Calendar Sheet: Navigate back to your primary content calendar tab.
- 04Select the Status Column Range: Click on the header of your "Status" column (let's say it's Column F) and then drag your mouse down to select all the rows where you anticipate entering status information. It's often good practice to select more rows than you currently need to accommodate future content. For instance, select
F2:F100if your data starts in row 2 and you want to plan for up to 100 pieces of content. - 05Apply Data Validation:
- From the Google Sheets menu, go to Data.
- Select Data validation.
- In the Data validation rules panel that appears on the right, click Add rule.
- Under Criteria, choose Dropdown (from a range).
- Click the grid icon next to the text box labeled "Range." This will allow you to select the cells containing your status options. Navigate to your "Lists" sheet and select the range of your statuses (e.g.,
Lists!A2:A13if your statuses are in cells A2 through A13). - Ensure the option "Show dropdown arrow in cell" is checked.
- You can customize the appearance of the dropdowns by clicking Advanced options. Here, you can choose to "Reject input" if data doesn't match the list, or "Show a warning." For statuses, rejecting input is usually best.
- Click Done.
Now, each cell in your "Status" column will have a dropdown arrow, allowing you to select a status from your predefined list. This ensures consistency and makes updating progress very quick.
Enhancing Visibility with Conditional Formatting
To make your content calendar visually intuitive, conditional formatting is invaluable. It automatically changes the appearance of cells based on their content, allowing you to quickly identify what needs attention.
Let's apply conditional formatting to the "Status" column. This will visually highlight the stage of each content piece.
- 01Select the Status Column: Select the entire range of your "Status" column (e.g.,
F2:F100). - 02Open Conditional Formatting: Go to the Format menu and select Conditional formatting.
- 03Add Formatting Rules: A panel will open on the right. Click Add another rule.
- 04Apply Formatting Based on Status: You will create a rule for each status. For example:
- Rule 1 (Idea):
- Apply to range:
F2:F100(or your selected range) - Format cells if... Choose Text is exactly.
- Value or formula:
Idea - Formatting style: Choose a light background color, like a pale yellow (
#FFF2CC) or a light grey. Click Done. - Rule 2 (Drafting):
- Click Add another rule.
- Apply to range:
F2:F100 - Format cells if... Choose Text is exactly.
- Value or formula:
Drafting - Formatting style: A slightly more noticeable color, perhaps a light blue (
#DAE8FC). Click Done. - Rule 3 (Scheduled):
- Click Add another rule.
- Apply to range:
F2:F100 - Format cells if... Choose Text is exactly.
- Value or formula:
Scheduled - Formatting style: A color indicating readiness, like a light green (
#D9EAD3). Click Done. - Rule 4 (Published):
- Click Add another rule.
- Apply to range:
F2:F100 - Format cells if... Choose Text is exactly.
- Value or formula:
Published - Formatting style: A muted color, perhaps a darker grey or no fill at all, as it's completed. Click Done.
- Rule 5 (Overdue/Needs Update): This requires a slightly more advanced rule.
- Click Add another rule.
- Apply to range:
F2:F100 - Format cells if... Choose Custom formula is.
- Value or formula:
=AND(F2="Scheduled", E2<TODAY())(Assuming "Status" is column F and "Publish Date" is column E). This formula checks if the status is "Scheduled" AND the publish date is before today. - Formatting style: A bright red or orange to signal urgency. Click Done.
By setting up these rules, you can instantly see which content pieces are in early stages, which are ready for publication, and which might be past their due date.
Color-Coding by Content Type or Platform
Beyond status, you can use conditional formatting to differentiate content types or the platforms they're intended for. This helps in visualizing the balance of your content mix.
For instance, to color-code by "Content Type" (assuming it's in column C):
- 01Select the Relevant Range: Select the cells in your "Content Type" column (e.g.,
C2:C100). - 02Add New Rules: In the Conditional formatting panel, click Add another rule.
- 03Create Rules for Each Type:
- Rule:
Format cells if... Text is exactly... Blog Post. Assign a color, perhaps blue. - Rule:
Format cells if... Text is exactly... Social Media. Assign a different color, maybe green. - Rule:
Format cells if... Text is exactly... Email Newsletter. Assign another color, like purple.
Continue for all your content types. This visual layering provides a quick overview of your content distribution. You can apply similar logic to the "Primary Platform(s)" column if desired, though it might get visually busy if you have many platforms.
Planning with a Calendar View
While the list view is great for data entry and tracking, a visual calendar layout is essential for understanding your schedule at a glance. You can create this using a separate sheet.
- 01Create a New Sheet: Add a new sheet and name it "Calendar View."
- 02Set Up the Grid: In this sheet, create a grid that resembles a calendar.
- In the first row, starting from a relevant column (e.g., B), list the days of the week: "Monday," "Tuesday," "Wednesday," etc.
- In the first column, starting from row 2, list the dates for the month you are planning. You can manually enter them or use a formula like
=DATE(2024, 1, 1)and drag to fill, then format the cells to show just the day number.
- 03Use Formulas to Pull Content: This is where the magic happens. You'll use formulas to pull content titles into the correct date cells. A common approach is to use
FILTERorQUERY.
Let's assume your main calendar sheet is named "Content Calendar" and has columns:
- A: Publish Date
- B: Content Title/Topic
- C: Content Type
In your "Calendar View" sheet, suppose you have the date January 1, 2024 in cell B2. You want to display content published on that date in the corresponding day's column.
Using FILTER (Simpler for basic needs): If you have a column for each day of the week (e.g., column B for Monday, C for Tuesday, etc.), and row 2 has the date for Monday, row 3 for Tuesday, etc., and your "Calendar View" grid is set up with dates in column A:
In cell B2 (for Monday of the first week): =FILTER('Content Calendar'!B:B, 'Content Calendar'!A:A = A2)
This formula pulls the "Content Title/Topic" from your main sheet ('Content Calendar'!B:B) for all rows where the "Publish Date" ('Content Calendar'!A:A) exactly matches the date in cell A2 of your "Calendar View" sheet. You would then drag this formula across and down to populate the calendar.
Using QUERY (More powerful for complex display): A QUERY function can be more versatile, allowing you to display multiple pieces of content for a single day or add more detail.
If your "Calendar View" has dates in row 2, and you want to list content for each day in the cells below: In cell B3 (under Monday, for the first date in row 2): =QUERY('Content Calendar'!A:C, "SELECT B WHERE A = DATE '"&TEXT(B$2,"yyyy-MM-dd")&"'", 0)
This QUERY looks at columns A through C of your "Content Calendar" sheet. It selects column B (Content Title) where column A (Publish Date) matches the date in B$2 (the date for Monday). TEXT(B$2,"yyyy-MM-dd") formats the date correctly for the query. The 0 at the end means no header row is returned.
You can expand this query to include other details. For example, to show the title and content type: =QUERY('Content Calendar'!A:C, "SELECT B, C WHERE A = DATE '"&TEXT(B$2,"yyyy-MM-dd")&"' LABEL B '', C ''", 0) This will display titles and types side-by-side.
To handle multiple posts on the same day, you might need to adjust the layout or use array formulas to stack them within a single cell (though this can get complex) or have each post occupy its own row within the day's column.
Visualizing Content Gaps
Once your calendar view is populated, you can easily spot gaps. Are there entire days or weeks with no content scheduled? This is a prompt to brainstorm new ideas or repurpose existing content.
You can also use conditional formatting on the "Calendar View" sheet. For example, you could highlight entire cells or rows if they contain no content for a particular day, signaling a potential gap.
Tracking Content Performance
A content calendar is more effective when it's linked to performance. By tracking key metrics, you can understand what resonates with your audience and inform future content strategy.
You can add a section or dedicated columns to your main "Content Calendar" sheet for performance data.
- Metrics to Track:
- Reach/Impressions: How many people saw the content.
- Engagement Rate: Likes, comments, shares, clicks relative to reach.
- Click-Through Rate (CTR): For CTAs that link to external pages.
- Conversions: Leads generated, sales made, sign-ups completed.
- Traffic: Website visits attributed to the content.
- ROI: Return on investment for paid promotion or time spent.
- Data Sources: These metrics will come from various platforms: Google Analytics, social media analytics dashboards (Facebook Insights, Instagram Insights, LinkedIn Analytics, Twitter Analytics), email marketing platform reports, and ad platform dashboards.
- Updating Performance Data: You'll need to regularly update these columns. You can either manually input the data or, if you're comfortable with Google Sheets'
IMPORTXMLor other data connectors (though these can be complex and break easily), attempt to pull some data automatically. For most users, manual updates are the most reliable.
Analyzing Content Effectiveness
With performance data logged, you can start analyzing.
- Identify Top Performers: Which content types, topics, or platforms consistently drive the best results? Look for patterns.
- Identify Underperformers: Which content isn't meeting its objectives? Try to understand why. Was the topic wrong? Was the CTA unclear? Was the promotion insufficient?
- Inform Future Strategy: Use these insights to double down on what works and refine or eliminate what doesn't. This is the core value of tracking performance.
Managing Multiple Content Types and Platforms
A key challenge in content planning is juggling different formats and distribution channels. Your Google Sheet calendar should accommodate this complexity.
- Platform-Specific Columns: If a particular platform requires unique data (e.g., character limits for Twitter, specific aspect ratios for Instagram Stories, keywords for YouTube), consider adding optional, platform-specific columns to your main calendar sheet. These might be hidden by default and only revealed when planning for that platform.
- Content Repurposing: Use your calendar to plan how content can be repurposed. A blog post could become a series of social media updates, an infographic, or a short video script. Mark these relationships in your "Notes/Links" column or add a "Related Content" column. For example, if a blog post (ID: BP001) is the source, you could list "BP001" in the "Notes" for its derivative social posts.
- Campaign Planning: If you're running a specific marketing campaign, you can use a dedicated tag in the "Content Title/Topic" or "Notes" column (e.g., "Campaign: Summer Sale") to group related content pieces. You could then use filtering to see all content for that campaign.
Common Pitfalls to Avoid
Even with a great template, users often stumble. Being aware of these common mistakes can save you a lot of frustration:
- Overly Complex Structure: Trying to include too many columns or highly intricate formulas initially can make the sheet unwieldy. Start with the essentials and add complexity as needed.
- Inconsistent Status Updates: If statuses aren't updated regularly, the calendar loses its value as a real-time tracking tool. Make status updates a routine part of your workflow.
- Ignoring Performance Data: Setting up performance tracking columns but never filling them in renders that part of the calendar useless for strategic decision-making.
- Lack of Ownership: If every piece of content doesn't have a clear owner, tasks can fall through the cracks. Ensure accountability.
- Not Reviewing Regularly: The calendar is a living document. Schedule weekly or bi-weekly reviews to plan ahead, check progress, and make necessary adjustments.
- Not Budgeting Time for Content: The calendar might list content, but does it reflect the actual time required for creation, review, and promotion? Ensure your schedule is realistic.
What If I Need to Track Multiple Versions of Content?
If you're creating variations of content for A/B testing or different audience segments, you can handle this in a few ways:
- Suffixing Titles: Add a suffix to the "Content Title/Topic" like "Blog Post: XYZ (Version A)" and "Blog Post: XYZ (Version B)".
- Using a "Notes" Field: Detail the variations in the "Notes/Links" column, referencing a master document that outlines all versions.
- Adding a "Version" Column: Introduce a new column specifically for versioning (e.g., "A," "B," "Draft 1," "Final").
How Do I Handle Content That's Published Over Multiple Days?
For content like a multi-part series or an event spread across several days, you have options:
- Multiple Entries: Create a separate row for each day's contribution to the series, linking them via the "Notes/Links" column.
- Date Range in "Publish Date": While not ideal for strict date-based sorting, you could use the "Notes/Links" column to specify the full range (e.g., "Published: Jan 15-17") and enter the primary launch date in the "Publish Date" column.
- Dedicated "Series" Column: Add a column for "Series Name" and potentially a "Part X of Y" indicator.
Can I Integrate This With Other Tools?
While Google Sheets is powerful on its own, you can integrate it with other tools. Zapier or Make (formerly Integromat) can connect Google Sheets to project management tools (like Asana, Trello), communication platforms (like Slack), or CRM systems. For example, when a status changes to "Scheduled" in your sheet, a new task could automatically be created in Asana. This requires setting up specific "Zaps" or "Scenarios" within those integration platforms.