Google Sheets vs. Excel: Which consulting invoice is better?
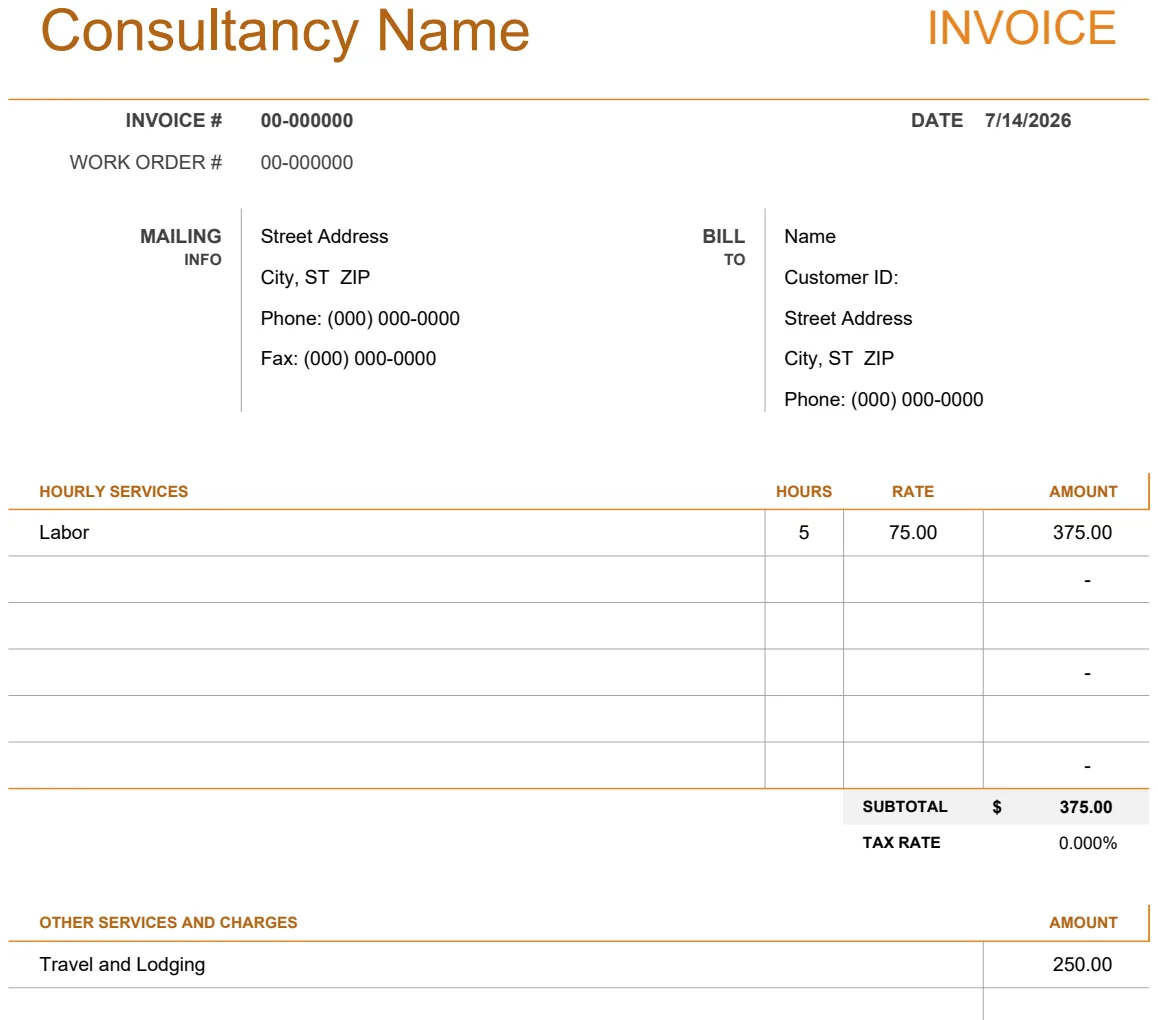
Learn to build a functional consulting invoice template in Google Sheets with automated calculations for taxes and totals.
By the end of this, you'll have a functional consulting invoice template in Google Sheets, complete with automated calculations for line items, taxes, and totals, ready to send to clients.
You'll be able to quickly generate professional invoices that accurately reflect your services and payment terms, saving you time and reducing errors. This guide will walk you through setting up a robust system, whether you're starting from scratch or adapting an existing spreadsheet. We'll cover essential fields, formula logic, and customization options to make your invoicing process smooth and efficient.
Essential Invoice Components
A professional invoice needs several key pieces of information to be clear and legally sound. At a minimum, you'll need your company's name and contact details, and the client's name and contact details. This establishes who is sending the invoice and who it's for.
You also need a unique invoice number for tracking purposes. A common practice is to use a sequential numbering system, perhaps with a prefix related to the year or project. Dates are critical too: an invoice date (when it was issued) and a due date (when payment is expected).
Line items are the heart of the invoice. Each service or product you provided should have its own line, detailing the description, quantity (if applicable, like hours), unit price, and the calculated line total. Don't forget to include any applicable taxes and a grand total. Payment terms, like "Net 30" or "Due upon receipt," are also crucial.
Setting Up Your Google Sheet
Open a new Google Sheet. The first step is to define your column headers. A good starting point might be:
- Invoice #: Unique identifier for the invoice.
- Date: The date the invoice was issued.
- Client Name: Name of the client.
- Client Email: For sending the invoice.
- Service/Product: Description of the work performed or item provided.
- Quantity: Number of units (e.g., hours, widgets).
- Unit Price: Cost per unit.
- Line Total: Calculated total for this line item (Quantity * Unit Price).
- Tax Rate: Applicable tax percentage for this line item.
- Tax Amount: Calculated tax for this line item.
- Grand Total: The final amount for the invoice, including all line items and taxes.
For a more robust setup, consider separate sheets. One sheet could be your "Invoices" log, with columns for Invoice #, Client Name, Date, Due Date, Amount, and Payment Status. Another sheet could be your "Client List," containing Client Name, Contact Person, Email, and Address. This allows you to easily pull client information without retyping.
Building Your First Invoice Row
Let's say you're setting up the line items for a specific invoice on a new sheet. In cell A2, you might enter your invoice number, say "INV-2024-001". In B2, the date, "01/15/2024". In C2, "Website Design Services". In D2, "40" for hours. In E2, "75" for the hourly rate.
Now, for the calculations. In F2, the "Line Total," you'll want a formula: =D2*E2. This multiplies your quantity by your unit price. If you have a separate tax rate, say in cell G2 (e.g., "0.08" for 8%), then in H2, the "Tax Amount," you'd use =F2*G2. The "Grand Total" for this single line, if it were the only one, would be =F2+H2.
As you add more line items in rows 3, 4, and so on, you'll want to replicate these formulas. You can do this by dragging the fill handle (the small square at the bottom-right of a selected cell) down.
Automating Totals with SUM or SUMIFS
To get a running total of all line items on your invoice, you'll need to sum the "Line Total" column. If your line items are in rows 2 through 10, you can place a formula in a summary section, perhaps off to the side or at the bottom of your invoice area, like =SUM(F2:F10).
Similarly, if you have taxes applied to multiple lines and want a total tax amount, you'd sum the "Tax Amount" column: =SUM(H2:H10). The final invoice total would then be the sum of the line totals plus the sum of the tax amounts: =SUM(F2:F10)+SUM(H2:H10).
A more flexible approach for complex invoices or when you have different tax rates might involve SUMIFS. For instance, if you want to sum line totals only for a specific service type, you could use =SUMIFS(F2:F10, C2:C10, "Website Design Services"). This sums column F only where column C matches "Website Design Services".
Adding Your Branding and Client Details
A professional consulting invoice template Google Sheets needs your personal touch. You can easily add your logo at the top of the sheet. Simply go to Insert > Image > Image over cells and upload your logo file. Position it in a corner, typically the top left.
Below your logo, or in a separate header section, add your business name, address, phone number, and email. Make sure this information is clear and easy to find.
For client details, you can create a dedicated section. If you're using a separate "Client List" sheet, you can use VLOOKUP or XLOOKUP to automatically pull the client's address and contact information into your invoice template once you select the client name from a dropdown. For example, in a cell for client address, you might have a formula like =XLOOKUP(ClientNameCell, ClientList!A:A, ClientList!B:B, "Client Not Found"), assuming client names are in column A of your "Client List" sheet and addresses are in column B.
Conditional Formatting for Status
To keep track of your invoices, especially if you have a master invoice log, conditional formatting is invaluable. On your "Invoices" sheet, you could set up rules for the "Payment Status" column.
For example, select the "Payment Status" column (e.g., column G). Go to Format > Conditional formatting.
- 01Rule: If "Text is exactly" "Paid", format the cell with a green fill.
- 02Rule: If "Text is exactly" "Overdue", format the cell with a red fill.
- 03Rule: If "Text is exactly" "Pending", format the cell with a yellow fill.
This visual cue makes it easy to see at a glance which invoices need attention.
Common Mistakes to Avoid
- Missing Invoice Numbers: Failing to assign a unique, sequential invoice number makes tracking payments and reconciling accounts a nightmare.
- Unclear Descriptions: Vague service descriptions can lead to client confusion and disputes. Be specific about what you did.
- Incorrect Calculations: Typos in formulas or incorrect tax rates can cost you money. Double-check your calculations, especially totals.
- No Due Date: Omitting a clear due date can lead to delayed payments. Always specify when payment is expected.
- Forgetting Contact Info: Not including your full contact details, or the client's, can create communication roadblocks.
Customizing Tax and Discounts
If your tax rates vary by service or region, you can add a "Tax Rate" column next to your "Unit Price" or "Line Total" columns. Then, your "Tax Amount" formula would reference this specific line's rate: =F2*G2 (assuming Line Total is F2 and Tax Rate is G2). If you have a standard tax rate for the entire invoice, you could put it in a summary cell and use that cell's reference in your line-item tax calculations, like =F2*TaxRateCell. For discounts, you can either apply them per line item or create a separate "Discount Amount" field in your summary section.
Using Templates for Efficiency
While building your own consulting invoice template Google Sheets is a great learning exercise, sometimes you need a professional solution quickly. For instance, the Consultants Invoices template offers a pre-built structure designed specifically for consultants, handling both invoice and work order tracking. If you need a more general-purpose invoice that can also track rental services, the Payment Invoice Template is a solid choice. For those requiring advanced branding and automatic calculations, the IC Services Invoice Template 8857 is worth exploring. These templates can save you hours of setup time.
Adding Payment Terms and Notes
Always include a section for payment terms. This could be a simple text entry like "Payment due within 30 days of invoice date" or "Payment due upon receipt." You can type this directly into a designated cell or, if you use it consistently, set it up as a default text within your template.
A "Notes" section is also useful for adding specific details relevant to the client or project, such as "Thank you for your business!" or "Please reference Invoice #INV-2024-001 with your payment." This personalizes the invoice and provides space for any additional communication.
Exporting and Sending Invoices
Once your invoice is complete in Google Sheets, you have a few options. You can send the sheet directly, but it's often more professional to export it. Go to File > Download > PDF Document (.pdf). This creates a non-editable, professional-looking document. You can then attach this PDF to an email to your client. Make sure your email subject line is clear, e.g., "Invoice [Invoice Number] from [Your Company Name]".