Sheets vs Excel: Which job tracker spreadsheet wins?
Discover the best job application tracker spreadsheet template to manage your job search effectively and avoid missed opportunities.
The assumption that a simple list of companies is enough to track job applications is a common mistake. You need more than just names; you need a system that captures critical details to manage your search effectively. A robust job application tracker spreadsheet template is your best tool for this. It moves you from reactive to proactive, ensuring no opportunity falls through the cracks.
This system helps you remember not just where you applied, but when, to whom, and what the next steps are. It’s about building momentum and understanding your progress in a competitive market.
Why a Dedicated Tracker Beats a Simple List
A plain list of company names offers minimal insight. You might remember applying to "Tech Corp," but what about the specific role? Was it a junior developer position or a senior project manager role? Did you submit a cover letter tailored to that specific job? Without a structured tracker, these details become hazy, making follow-ups and tailored applications a chore.
A well-designed job application tracker spreadsheet template provides context. It allows you to categorize applications by industry, role type, or even salary expectations. This structure is crucial for organizing your job search, especially if you're applying to multiple positions across different companies or sectors.
Essential Columns for Your Tracker
To make your job application tracker truly effective, consider these columns. Each serves a specific purpose in managing your job search:
- Company Name: The name of the organization you're applying to.
- Job Title: The specific title of the position.
- Application Date: The date you submitted your application. This is vital for knowing when to follow up.
- Platform/Source: Where you found the job posting (e.g., LinkedIn, company website, Indeed, referral).
- URL of Job Posting: A direct link to the original job description. This is incredibly useful if the posting is removed.
- Contact Person: The name and title of the hiring manager or recruiter, if known.
- Contact Email/Phone: Their direct contact information.
- Application Status: Options like "Applied," "Under Review," "Interview Scheduled," "Offer Extended," "Rejected," "Withdrawn."
- Date of Next Action: When you plan to follow up or when the next step is scheduled.
- Notes: A free-text field for any specific details, like keywords from the job description, interview insights, or reasons for rejection.
- Salary Range (Desired/Offered): If discussed, note the salary expectations.
- Location: The city or remote status of the position.
Building Your Tracker: A Step-by-Step Guide
Let's walk through setting up a functional job application tracker spreadsheet template in Google Sheets or Excel.
- 01Open a New Spreadsheet: Start with a blank workbook.
- 02Create Column Headers: In the first row, enter the essential column names listed above. For instance, in cell A1, type "Company Name"; in B1, type "Job Title," and so on.
- 03Format Headers: Make the header row bold and perhaps add a background color to distinguish it from the data. This improves readability.
- 04Set Up Data Validation for Status: For the "Application Status" column, use data validation to create a dropdown list.
- In Google Sheets: Select the entire "Application Status" column (e.g., G2:G1000). Go to Data > Data validation. Choose "List from a range" or "List of items." Enter your status options like "Applied,Under Review,Interview Scheduled,Offer Extended,Rejected,Withdrawn".
- In Excel: Select the column. Go to Data > Data Validation. Under "Allow," choose "List." In the "Source" box, type your status options separated by commas (e.g., Applied,Under Review,Interview Scheduled,Offer Extended,Rejected,Withdrawn).
- 05Format Dates: For "Application Date" and "Date of Next Action," format the cells as dates (e.g., Month Day, Year). This helps with sorting and chronological tracking.
- 06Add Formulas (Optional but Recommended):
- Days Since Applied: In a new column, you could calculate how many days have passed since you applied. If "Application Date" is in column C, and today's date is
=TODAY(), a formula in D2 could be=TODAY()-C2. Format this column as a number. - Follow-up Reminder: You can use conditional formatting to highlight rows where the "Date of Next Action" is today or in the past.
- 07Populate Your Data: Begin entering details for each job you apply for. Be consistent with your entries.
Leveraging Excel/Sheets Features for Efficiency
Once your tracker is set up, several features can make managing it much easier.
- Filtering: Use the filter function (Data > Filter in most spreadsheet programs) to sort your applications. You can filter by status to see only "Under Review" jobs, or by company to see all roles at a specific organization.
- Sorting: Sort your entire list by "Application Date" to see your most recent applications, or by "Company Name" alphabetically.
- Conditional Formatting: This is a game-changer for visual cues.
- Highlight rows where "Application Status" is "Interview Scheduled" in green.
- Highlight rows where "Application Status" is "Rejected" in red.
- Highlight rows where "Date of Next Action" is today or in the past and the status is not "Offer Extended" or "Rejected" in yellow to remind you to follow up.
- Search and Replace: If a company changes its name or you want to update a contact person across multiple entries, this tool is invaluable.
Common Mistakes to Avoid
Many job seekers make simple errors that undermine the usefulness of their tracker.
- Inconsistent Data Entry: Using different terms for the same status (e.g., "Interview" vs. "Interview Scheduled") makes filtering and analysis impossible. Stick to your defined dropdown options.
- Forgetting to Update Status: A tracker is only as good as its current information. If you had an interview, update the status immediately. If you got rejected, mark it. An outdated tracker is misleading.
- Not Saving Job Posting URLs: Many job boards remove listings after a certain period. Saving the URL ensures you can revisit the original description, especially if you're asked about specific responsibilities during an interview.
- Over-Complicating the Template: While many columns are useful, don't add so many that it becomes a burden to fill out. Start with the essentials and add more as your needs evolve. A job application log template can be a great starting point.
Advanced Tracking and Related Tools
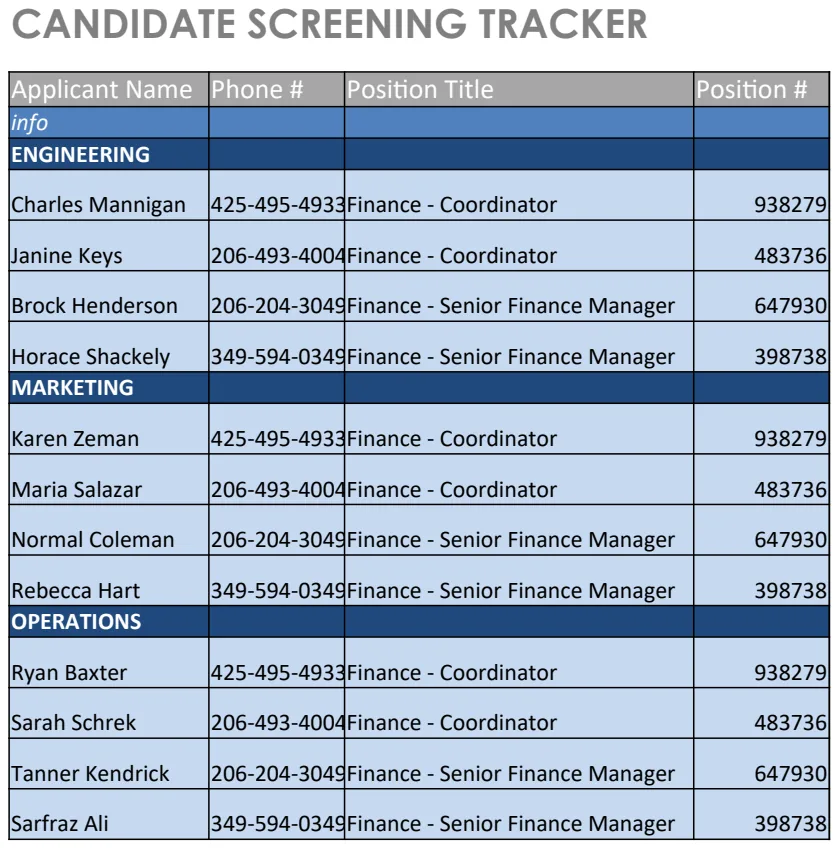
For those managing a high volume of applications or working within a larger team, more sophisticated tools might be beneficial. However, for most individuals, a well-structured spreadsheet is sufficient. If you find yourself needing to screen candidates for a role you're hiring for, a Candidate Screening Tracker could be a good fit. Similarly, if you're collecting applications for a position, a Job Application Form or a Job Application Form 2 can standardize the initial data collection.
The core benefit of a job application tracker spreadsheet template is organization and accountability. It ensures you're making informed decisions and taking timely actions throughout your job search.
What if I'm applying for very different types of roles?
If you're targeting diverse roles, add a "Role Type" or "Department" column to your tracker. This allows you to filter applications by the kind of position you're pursuing. For instance, you could group "Software Engineering," "Product Management," and "Marketing" roles separately. This helps you tailor your follow-up strategy and remember the specific skills or experiences relevant to each category.
How do I handle multiple applications to the same company?
If you apply for several roles at one company, you can either create a new row for each application, clearly stating the different job titles, or you can group them under the company name. If grouping, ensure you add a column for the specific "Job Title" applied for. For example, you might have "Company Name: Tech Innovations Inc." listed multiple times, each with a different "Job Title" like "Senior Data Scientist" and "Machine Learning Engineer." This method keeps all your interactions with a single employer consolidated.
What's the best way to track follow-ups?
The "Date of Next Action" column is key. When you submit an application, set a date for a follow-up email, typically 5-7 business days later. If you have an interview, put the interview date in this column. Then, use conditional formatting to highlight rows where this date is approaching or has passed. This visual cue ensures you don't miss crucial follow-up opportunities.
Can I use this for freelance applications too?
Absolutely. The principles are the same. You can adapt the column headers to suit freelance work, perhaps changing "Job Title" to "Project Name" or "Client." The "Application Status" could include stages like "Proposal Sent," "Client Review," "Negotiation," and "Project Secured." A job application tracker spreadsheet template is a versatile tool for managing any kind of professional opportunity.
This comprehensive approach ensures your job search is methodical, and you're always in a position to make the best impression. Our library of templates includes options like the Job Application Log that can serve as a solid foundation. Remember, once you subscribe for just $9, you get unlimited downloads, making it easy to find the perfect template for your needs.